Sunday, December 16, 2007

Layer Styles-Christmas 2007


I was looking at some Christmas Layer Styles that I really liked and finally figured out how to make them myself. So I have used Christmas Custom Shapes and fonts to make these styles.

Remember when using my Layer Styles you can change the Pattern Overlay Scale of the design.. you can make the design larger or smaller. Go to Blending Options (in the Layers Pallette click on the little "f" at the bottom of the Pallette) and click on Pattern Overlay. See "Scale" under the pattern? Change that # larger or smaller to suit your fancy. If you change this Scale you must also change the scale in the Texture (under Bevel and Emboss) and the Scale in the Stroke (if the Fill Type was Pattern). Keep the scale the same number for the Pattern Overlay, Texture, & Stroke.


Merry Christmas everyone!!

18 Christmas Layer Styles

Cheers

Sunday, December 09, 2007

Laces re-uploaded


I read a plea for help on one of my Yahoo groups that I subscribe to... and they wanted Laces... which luckily for her I had made back in July as part of my Frangipani group. So I have uploaded the Laces (5 parts) to MediaFire & decided I might as well include them here in case some of you didn't get them back in July.

The laces are: Rings; Bottom Laces; Top Laces; Rings & Laces; and Rings, Laces & Background on Torn Paper.

I made the laces & rings separate so that you can recolor the rings one color and the laces a different color. Again... Image... Adjustments...Hue/Saturation is excellent for re-coloring....
Or.... Click on the little "f" at the bottom of the layers pallette and that opens the Layer Style window... choose Color Overlay... Multiply or Soft Light work well.... Play around with the different Blend Modes...

If you see anything else you'd like & the links are dead just email me at
dundas2002au@yahoo.com
with a subject of Dead Links
and I'll see about re-uploading the goodies to MediaFire

Bottom Laces

Top Laces


The Rings

Rings & Laces

Rings, Laces, & Background

Merry Christmas everyone!
Cheers, Barb

Tuesday, December 04, 2007

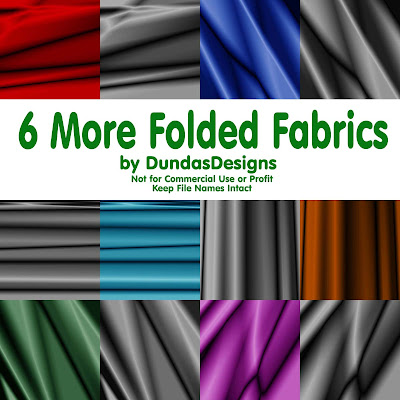
6 More Folded Fabrics!


I see by the number of downloads that you really liked yesterday's Folded Fabrics... so I've made 6 more and included the "without color" version so that you can add your own colors to them...


You can add your own color to yesterday's Folded Fabrics too... just double click on the Layer name of "Background".. rename it... then double click on the little "f" icon at the bottom of the Layers Palette... choose Color Overlay.. then try different Blend Modes: Darken, Multiple, Overlay, Soft Light are some that worked well.


You can also change colors by going to Image --> Adjustments --> Color Balance.. play with the settings..
or..
Image --> Adjustments --> Hue/Saturation... play with the settings.

With the "without color" versions you can add color by Image --> Adjustments --> Color Balance.. play with the settings..

or..
Double click on the Layer name of "Background".. rename it... then double click on the little "f" icon at the bottom of the Layers Palette... choose Color Overlay.. then try different Blend Modes: Darken, Multiple, Overlay, Soft Light are some that worked well.

We'll be busy getting ready for hub's surgical proceedure and the surgery for the next
3 weeks... so I won't be posting anything new for a while... possibly until after the New Year. So you all have a very Merry Christmas and the Happiest of New Years!!

Click here to get the 6 new folded fabrics & the matching "without color" here.

Cheers!

Monday, December 03, 2007

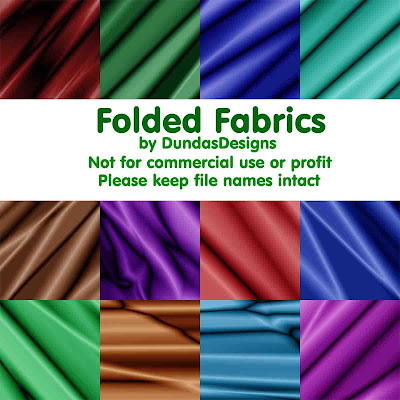
Folded Fabrics


I've had to re-upload this set.. it should be working now.

But in the meantime... here are 12 Folded Fabric backgrounds. They're really pretty, aren't they! I used the tutorial at
www.tutorials-photoshop.com and I just KNEW I had to blog them as soon as I made the first one!

Enjoy.. and remember to leave a comment... I really like knowing how you like the goodies and what you plan on doing with them.

Cheers all!!

Saturday, December 01, 2007

Christmas Patterns 1


Happy December everyone!

I made this set of 64 Christmas Patterns a while ago... and from the title you can see that I plan on uploading more... which I've already made.. just need time to upload them and blog...

I used Al Ward's Pattern Generator to make these patterns.

There are lots of greens & reds... Use them to make ribbons, buttons, papers, change the scale in the Blending Options, use different color overlays, experiment, play with your Photoshop, try new things... get creative!!


Have fun and Cheers!
Please keep file names intact.

Thursday, October 25, 2007

Spiders! Day 4


Last day of Spiders! Spiders!! Spiders!!! Today's freebies include 4 different embroidered shapes, a grey alpha (both upper & lower case), 2 purple frames, 4 pins, and 8 dripping torn papers.

Embroidered Shapes

Grey Alpha - Upper Case

Grey Alpha - Lower Case

Purple Frames

Pins

Dripping torn papers


The spiders are from a Photoshop Custom Shape by Jenny W on www.adobe.com Exchange

The Alpha, Frames, Pins & Dripping Torn Papers use a layer style from Al Ward's Actionfx on www.actionfx.com along with Jenny W's custom shape made into a pattern.

The Alpha is VAGRounded BT font.

The Embroidered Shapes are custom shapes from Al Ward's ActionFX and the Embroidery is from Atomic Cupcakes Embroidery Action

I hope you have enjoyed the Spiders! Spiders!! Spiders!!! kit.

Until the next inspiration...
Cheers!!

Spiders! - Day 3


Day 3 of Spiders! Spiders!! Spiders!!! You'll find 2 grey frames, the green alpha (caps & lower case), 8 more torn papers, 8 ribbons, 36 corners, 24 placemats (12" x 18"), and 4 embroidered shapes.

Take the 12" x 18"placemat jpg's to a place that will print them (like Kinko's) and be sure to sandwich them between layers of plastic so that they can be used year after year.

4 Embroidered Shapes
36 Corners 8 Ribbons
8 Torn Papers
2 Grey Frames
Green Alpha Caps
Green Alpha Lower Case
24 Placemats

The spiders are from a Photoshop Custom Shape by Jenny W on www.adobe.com Exchange

The Alpha, Frames, Corners, Placemats & Ribbons use a layer style from Al Ward's Actionfx on www.actionfx.com along with Jenny W's custom shape made into a pattern.

The Alpha is VAGRounded BT font.

The Torn Papers used Atomic Cupcake's Wild Tear Action, Jenny W's Custom Shape Spider made into a pattern, and one of Al Ward's layer styles.

The Embroidered Shapes are custom shapes from Al Ward's ActionFX and the Embroidery is from Atomic Cupcakes Embroidery Action

Cheers Everyone :)

Wednesday, October 24, 2007

Spiders! Day 2


Today will be .... yup, you guessed it..... more Spiders!!!! In the downloads today you'll find the purple upper & lower case alpha, 16 brads, 2 orange frames, another set of 4 torn papers, and an embroidered pumpkin.

Purple Alpha Caps
Purple Alpha Lower Case

Brads
Orange Frames

Torn Papers 2

Embroidered Pumpkin

MaggieM... I uploaded the Spider again.. this time just the .png ... see yesterday's blog in the "Update"


The spiders are from a Photoshop Custom Shape by Jenny W on www.adobe.com Exchange

The Alpha, Frames, & Brads use a layer style from Al Ward's Actionfx on www.actionfx.com along with Jenny W's custom shape made into a pattern.

The Alpha is VAGRounded BT font.

The Torn Papers used Atomic Cupcake's Wild Tear Action, Jenny W's Custom Shape Spider made into a pattern, and one of Al Ward's layer styles.

The Pumpkin is a custom shape from Al Ward's ActionFX and the Embroidery is from Atomic Cupcakes Embroidery Action

Have a wonderful day,
Barb

Tuesday, October 23, 2007

Spiders! Spiders!! Spiders!!!


It's that time of year and this kit will take care of all those LO's with those trick or treaters, gremlins, ghosts, and goblins. This kit is another whopper which I'll upload over the next few days. One of these days I'll learn how to make a small kit!!!

Today you get the 26 papers, an upper & lower case alpha, 2 frames, 4 torn papers, 16 buttons, 16 flowers and a big olde spider. Not everything is shown in the preview.

Papers
AlphaCaps
AlphaLowerCase
Frames
Flowers
Torn Papers
Buttons
Spider

UPDATE: MaggieM said she couldn't download the Spider... so I've put another spider up... just the png file... Spider2
Hopefully this one will work....

The spiders are from a Photoshop Custom Shape by Jenny W on www.adobe.com Exchange
The Alpha, Frames, Flowers & Buttons use a layer style from Al Ward's Actionfx on www.actionfx.com along with Jenny W's custom shape made into a pattern.
The Alpha is my favorite VAGRounded BT font.
The designs on the papers were made using Mehdi's Kaleidoscope Filter and Jenny W's Custom Shape made into a pattern.
The Torn Papers used Atomic Cupcake's Wild Tear Action, Jenny W's Custom Shape Spider made into a pattern, and one of Al Ward's layer styles.

That's it for today... still more to come over the next 3 or 4 days.
And thank you everyone for your wonderful comments! I love them!!
And congrats to Cindyrelly for her first kit!!! I'm so proud of her!
See her kit & LO's on her blog

Cheers everyone! Barb

Friday, October 19, 2007

Ribbons & Bows


Here's a Ribbon & Bow... I've been working on a Spiders Kit which I'll put up in a few days... in the meantime... this Ribbon & Bow is ready for a color overlay to match your latest LO...Add a rivet, brad, staple, etc in the Ribbon & you're ready to go!! Enjoy!!

Please retain file names.

Ribbon

Bow

Sunday, October 07, 2007

Halloween Alphas - 6 of them!

Well, I wasn't going to do an Alpha.. but I was playing around with fonts and ran into the Halloween Kiddy Font.. I don't like the sharp corners on that font so I used VAGRoundedBT and Al Ward's Halloween Custom Shapes 090307 halloween_001 & 002. The "A" in every alpha has the same shapes, the "B" has a different combination of shapes, etc... I used Al Ward's ActionFX Layer Style 100407 Glossies_002 Style 27... except I deleted the Stroke. Yes, I know I sound like a commercial but he has a multitude of actions, brushes, layer styles, patterns, & custom shapes, & he's building a digital scrapping section, too... over 102,000 goodies altogether!!!

All of the warping in the Preview was done by me & PS CS2 Warp & Distort... Those warped & distorted letters DO NOT come in the 6 files... You'll have to do that yourself. If you need help just zip an email to me (dundas2002au@yahoo.com) (That's the old teacher in me... still trying to teach. :)) )

Each letter is 2" x 2" at 300pi
Please keep the names of each file intact.

PURPLE ORANGE GREEN

YELLOW

GREY BLACK


I love each and every one of your comments!!! Thank you for your good health wishes for my dh. Hub's had the electro-cardiogram, the echo-cardiogram, the brain scan, & the carotid artery scan... He gets the heart monitor halter on the 25th and then the "find out the results" appointment on the 29th.

I'm holding my breath!!

Cheers,
Barb :)

Sunday, September 30, 2007

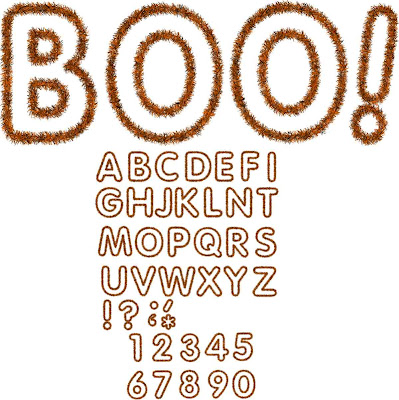
Halloween Alpha


Jean, the dangerous thinker (in the comments) ... lol... suggested I make a Halloween Alpha of the fuzzy fibers.. So, as you see above... it's done... all caps, numbers, and a few others things. I saved each letter at 2" in height to keep the size of the file down.. as it was I had to split them into 3 files (I like to keep the files around 5mb for the dial up downloaders ... so this way you can lasso them and transform them (Control T) to any size you like...

Once again I'll give the credits for the tutorials that I followed...
Digital Scrapbook Place tutorials I used the Fuzzy Fibers by Jamie Rousselle and then Using a Path to make a brush in Photoshop by Angie Svoboda

Halloween Alpha1
Halloween Alpha2
Halloween Numbers

dianagrind wanted a Red & Black O & U for Oklahoma University..
Hopefully you have Photoshop... (I'm sure there's some way to do it in PSP) you can re-color the letters & numbers... Here's how to do it in Photoshop:

Open the Alpha or Numbers...
Lasso (Lasso tool in your tools palette) & move the letter you want to a New File (I use 12x12 at 300pi)

Control T (transform) ... grab the handles and enlarge it as far as it'll go to fill the 12x12 file

Double click inside the transform box to close the transform

Control U (Opens the Hue/Saturation window)
Adjust the Hue... a setting between -22 and -31 gives you Red & Black
When you have the color you want... click OK

OR:

Open the Alpha or Numbers...
Lasso & move the letter you want to a New File (I use 12x12 at 300pi)
Control T ... grab the handles and enlarge it as far as it'll go to fill the 12x12 file
Double click to close the transform

Open your Layers Palette (Window... Layers)
Click on the "f " icon at the very bottom of the Layers Palette
Choose Color Overlay
Blend Mode: Soft Light
Choose the color of your choice...
An interesting thing... if you choose Pink going down to the Blue colors... you get different gradings of Red & Black!!!!

Cheers!!

Friday, September 07, 2007

Wrinkled & Crinkled Brushes!!!


We've had more rain here in Queensland but after a decade of drought we're all happy to see the wet stuff! Our new 23,000 litre rain water tank is full to the brim and we're wishing we had another tank with all of this rain! (The water in the tank is used to water our fruit trees only).


So instead of moping around because it's dreary I've made some brushes from the Wrinkled & Crinkled papers. The preview was made using a light colour for the brush and a darker colour for the background. It makes some awesome papers, don't you think? I clicked about 4 times to make the brush... each time you click you get a darker brush.

The brushes at 2500px are about 8 x 8" so just do a Control-T and expand them to 12 x 12" or whatever size you want.

You can find the Wrinkled & Crinkled Brushes HERE:

Enjoy everyone!
Cheers,
Barb

Sunday, September 02, 2007

Wrinkled & Crinkled Overlays


I just love these Wrinkled & Crinkled overlays that I whipped up this morning. The kit contains 20 different wrinkled & crinkled overlays all at 12" x 12" at 300 dpi. In the preview you see 3 coloured overlays (included in the kit) with which I played with the Blending Options... Colour Overlay - Soft Light, Bevel & Embossed, Stroke... I just played around with the different Blending Options so I know you'll come up with some awesome colours & backgrounds! I also included one other coloured overlay (dundasWrinkledCrinkled2a.jpg) with which I reduced the Opacity to 50% before I gave it a Colour Overlay - Soft Light ... There are 22 overlays in the kit... after I had uploaded the kit I realized that #11 & 12 were a repeat of #9 & #10.. so you get those twice. All 20 overlays are different so you should never run out of different wrinkled & crinkled overlays!! :)

Enjoy and all comments are deeply appreciated.
Let me know how you like these.. I can always make more if you wish.

You'll find the Wrinkled & Crinkled Overlays here.
Cheers, Barb

Saturday, August 25, 2007

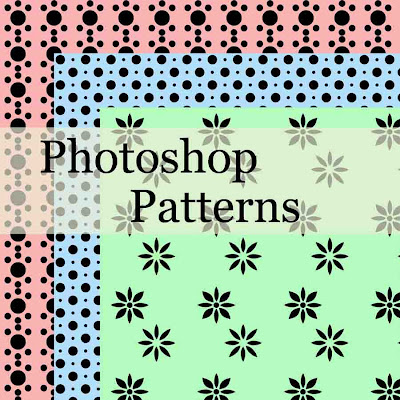
Photoshop Patterns


Why wait, eh? I've only shown 3 patterns... there are a LOT more than that!

They work in both PS 7 and PS CS2


Photoshop Patterns

Enjoy!!

Cheers, Barb

New Goodies


Here are some new goodies I whipped up yesterday... I was playing around with Overlays... and making my own Patterns... The Overlays are very basic... squares & circles but can come in handy so often!! When looking thru kits on sale you see a couple of these designs over and over again. Each one is a png file... you can re-colour it, put it on top of a background coloured layer, or behind and reduce the opacity of the top layer... you can put one overlay on top of another... re-position them.... do whatever comes to mind.. use it over and over...

Here are the
Overlay goodies

And hopefully tomorrow I'll start uploading the patterns that I whipped up...
Along with the ones I made into .png files.. there are several... lots... more.

jsj left a comment today that they couldn't access Day4 Goodies... I'm not sure which Day4 Goodies you were referring to... so I checked all the Day4 Goodies and they are all still working and downloadable... If jsj (or anyone else) is still having problems... please email me and let me know the specifics... dundas2002au@yahoo.com .... make the subject : Day4 Goodies


Have a terrific day!

Cheers, Barb

Monday, August 13, 2007

Day 5 - Wrapping Paper


I've outdone myself this morning... 6:53am as I write this blog and I've uploaded 9 (yes, nine files for today!!), made a preview, and even had brekkie!!

Todays goodies, the last goodies for this kit, are Stamps 1, 2 & 3, Stitches, String, Tags 1, 2, & 3, and Masking Tape.

The Stamps were made following the tutorial at www.eSCRAPPERS.com.

I've made 3 copies of each stamp; one for Australia, one for the USA, and one for everyone to add your own price, titles, comments and/or country. Two of the stamp pictures are from my Frangipani Kit that is in the archives and still available, the third stamp was made using items from the Wrapping Paper Kit.

The flower on the Wrapping Paper Stamp used a brush from ActionFX.

The Masking Tape was made following the tutorial at Pixel2Life.
The tutorial was for CorelDraw and Corel PhotoPaint but was easily adapted to Photoshop CS2.
These stamps are for your LO's only.. not to be used in real life!.

The Stitches were made using the Atomic Cupcake Stitched Edge and Stitch Messy Actions.

The Tags were made using Atomic Cupcake Chipped Paint and Burnt Edges Actions.

I forgot to mention (a Senior moment!!) yesterday that the postal stamp was a .psd file so that you can delete and add your own city, state, and date.

If you have any problems with any of the pieces in this kit.. just email me at dundas2002au@yahoo.com or dundas@hotmail.com Just put the subject as Wrapping Paper....

OK.. Here are the goodies for today!!

As always, your comments are soooo appreciated. (Jean, you're a star!!)
Cheers everyone! Barb

Sunday, August 12, 2007

Day 4 Goodies


Ahhhhh... here it is 7:22 AM Queensland time and I have the files uploaded, the Day 4 preview made and writing the blog for the day!!! I "am" a morning person!!

Thank you Jean for your comment.. and yes, I agree there are sooooo many possibilities for this kit... and I'm glad you like the ropes as much as I do.

OK.. todays goodies consist of the ribbons, ropes, staples, screws, rivets, scotch tape, a mailing label, an airmail label, a customs form... can't you just see a layout with a package upwrapped.. and photos atop the paper.. with the mailing label, airmail label, and customs form all filled out!!! Of course you can see the rope too....

Oh... and just to make it clear.. these mailing labels, airmail label, and custom forms are for LO's only... NOT to be used on actual postal packages... I don't want anyone getting into trouble with the postal police!!! I've included warnings on the customs and airmail labels which are .psd files.

I've just realized I've forgotten stamps!!! I'll have to whip up some stamps and include them in the downloads for Day 5!!

Don't forget to leave a comment!! Your ideas encourage me to make more goodies... everyone loves to feel appreciated!

OK... Here are the goodies for Day 4

If you have any problems with the files at 4Shared I've re-uploaded them to Mediafile
You can find them here.... Each one is a different url so be sure to click on each one. I've also broken the Ribbons file up into 6 different files...

Stamps & Mailing

Screws, Staples & Rivets
Rope
Ribbons1
Ribbons2 Ribbons3 Ribbons4 Ribbons5 Ribbons6

Enjoy everyone!!
Cheers, Barb

Saturday, August 11, 2007

Day 3 Wrapping Paper


It's amazing what 7 hours a sleep can do for a body!! But then I'm a morning person and trying do anything, much less even try to think, past 3pm... is a lost cause.

OK... Day 3 is Papers and Journals day.... Different papers, different effects to them... some burned (Atomic Cupcake burnt edges), some with chipped paint (Atomic Cupcake chipped paint), some with folded tears (Atomic Cupcake folded tear), some with a medium tear (Atomic Cupcake medtorn), some Kaleidoscope (Mehdi Kaleidoscope). The Mehdi plugins are free for the dl'ing. You are free to transform (Control-T) any of the papers to make them smaller or larger for your LO's. Enjoy!!

Blogger & 4shared are giving me fits today!! So if there are any problems I can be reached at dundas2002au@yahoo.com or dundas@hotmail.com

Here are the 6 zip paper files

Cheers, Barb

Friday, August 10, 2007

Wrapping Paper - Day 2


I'm late!! I'm late!!!

I've been reading and playing with tutorials all day long!!!
So I'll publish the url and then go back and get a photo preview of the Buttons, Corners, Eyelets and Frames.... I'm not going to advertise this kit until I have all 5 days up and running.. but if you want to spread the news by word of mouth.. or word of email... that's fine with me.. just send them here.

OK... Day 2 Buttons, Corners, Eyelets and Frames are HERE

I just love the Rope Corners and Rope Frames!!!

The rope was made following the "Making a Rope" tutorial on www.scrapbook-bytes.com in the Photoshop Elements "New" section.

The stitching was made using the Atomic Cupcake actions: Stitched Edge and Stitched Messy

Enjoy everyone...
Cheers, Barb

Thursday, August 09, 2007

Here it is!!!


Everything you need to mail a package!! Here it is! Day 1 includes 3 Alphas, 6 Bows, 5 Brads and 4 Bubblewrap.

The Alphas use Cowboys font and DriftType font. The DriftType font was made in black and you can use your color overlay to re-color these. The 6 Bows use the Atomic Cupcake Bow Template and the Atomic Cupcake Knot Template. The 5 Brads are made using Atomic Cupcake Burnt Edges, Chipped Paint, Embroidery, Felt, and Gel. The Bubblewrap is a scan of some bubble wrap I had here at home. These can be re-colored for some different looks.... They'd make a nifty background with the opacity reduced, don't you think?

I'd really like to know what you think of this kit... so please leave a comment here or on 4shared. It's not your run of the mill kit that we all love... something a bit different.

You can find the Alphas, Bows, Brads & Bubblewrap HERE
Cheers everyone, Barb

Thursday, July 19, 2007

Frangipani - 300 dpi


For those of you who are not aware.. I inadvertently made about 3/4 of the Frangipani Kit in 72 dpi rather than the 300 dpi due to a New File Preset being labeled incorrectly... so I have re-done the kit in 300 dpi...


Frangipani Day 1 & Day 2 ... Brads, Buttons, Eyelets, Papers1, Papers2, PapersMisc1, PapersMisc2, PapersMisc3, PapersMisc4, PapersPlain, and Torn.

The PapersPlain file only shows as 126kb.. but trust me... it's 6MB... I downloaded it to make sure it had the 300dpi papers... It does..

Frangipani Day 3 ... Photo Corners and Pins.

Frangipani Day 4 ... Ribbons 1, 2, 3, & 4 and Tags

Frangipani Day 5 ... Alphas 1, 2, 3, & 4, and Flowers&Leaves

Frangipani Day 6 ... Bows 1 & 2, and Frangipani Frames 1 & 2

Frangipani Day 7 ... Fringed & Frayed Mattes, Laces and the Brushes & Patterns.

Frangipani Day 1 & Day 2 can be found HERE!!

Frangipani Day 3 can be found HERE

Frangipani Day 4 can be found HERE

Frangipani Day 5 can be found HERE

Frangipani Day 6 can be found HERE

Frangipani Day 7 can be found HERE

And please leave some comments... I've so enjoyed everyones encouragement, comments, remarks, tips, help, and love.... Digi Scrappers are the best people in the world!!

Cheers everyone, Barb

Tuesday, July 17, 2007

Day 7 - Frangipani


Ahhhh the final day of Frangipani has arrived! Today will be the final 3 parts of the kit; the Fringed & Frayed Mattes, the Frangipani Brushes & Patterns, and last but not least, the Laces.

The fringe on the 6 Fringed Mattes were made with "Bannerwoman's Fabric Tutorial" on www.bannerwoman.com. Although Bannerwoman's tut is for PSP I was able to adapt it to PS CS2.

The 2 Frayed Mattes were made using Atomic Cupcakes Frayed Fabric Action.

I've designed 3 different .png files of Laces... dundasLaces1, dundasLaces2, & dundasLaces3. #1 is with the green background, #2 is with the background missing, and #3 is a longer row of laces with no background... you can re-colour any of these..

I've also included brushes (
dundastoplacesRGB, dundasbottomlacesRGB, and dundasrings) and .png files of the 3 separate layers of the laces (dundastoplacesRGB.png, dundasbottomlacesRGB.png, and dundasrings.png).

The brush laces are a fewer number of laces than the .png files With either the brush or the png files.. lay down the bottom lace first... re-colour, then place the rings, re-colour, then the top laces, re-colour.

When using the brush of the laces & rings.. make sure you keep the same size (the Master Diameter) for all 3 layers.

After each layer use the up, down, right, & left arrow keys to move the laces into position.


If you're going to use any of the Blending Options... do it now BEFORE you merge the 3 layers!

After you have everything placed the way you like it.. and each layer re-coloured to your choice... merge the three layers (top laces, bottom laces, rings)... then if you wish to re-size them do it AFTER you've merged the 3 layers.

With the 3 different files of laces (
dundastoplacesRGB.png, dundasbottomlacesRGB.png, and dundasrings.png) you can choose to color the rings one colour and the laces a different colour, or you can colour all the layers and rings the same colour.... or even different colours for all three layers.. go wild!!

Again.... if you're having problems understanding any of this.. email me.

One last word:
Gotta Pixel Tutorial: Gotta Do It! - Folded Corners: 07-20-2007 04:00 PM - 05:00 PM

Notice the time... that's different from the other notice I posted... I guess I'll be checking both times if possible.. 4PM EST USA would be 6am July 21st here in QLD.....

OK...
Day 7 - Fringed & Frayed Mattes, the Frangipani Brushes & Patterns, and Laces are to be found HERE .....

December 9, 2007

I have re-uploaded the Laces to MediaFire so the url's are now working.

Bottom Laces

The Rings

Top Laces

Rings & Laces

Rings, Laces & Background

If you see anything else where the links are dead and you'd like me to upload to MediaFire just send an email to dundas2002au@yahoo.com

Cheers, Barb

Plus here are Days 1 thru 6 so you can play catch-up ;)

Day 6 Day 5 Day 4 Day 3 Day 1 & 2

Enjoy everyone!! And keep those comments, suggestions, ideas, tips & techniques coming in.. They are all appreciated!

I've already had a brainstorm for a new kit.. I was looking at some brown wrapping paper and it had the neatest blips & blobs and shadowing already on it so I scanned it and then made some papers, ribbons, torn pages, an alpha, burned edges on the papers, ribbons & torn pages.....

That will go up in a few days.. Until then...

Cheers, Barb :)

Monday, July 16, 2007

Day 6 - Frangipani

Good Morning everyone! It's 9:40AM Queensland, Australia time... that's 7:40PM EST USA.. quite a time difference, eh!?!

Thank you all for the comments thru the blog and thru my email addy.
I really appreciate your comments, questions, ideas, and suggestions. I'm open to everything re: digital scrapping & Photoshop... so keep those comments coming!!

Day 6 of the Frangipani Kit.. Today is Bows & Flower Frames! The little bows and knots are from the Atomic Cupcakes actions. I love their actions!! And the price can't be beat... about 20 cents for each action when you purchase a month's access to their action website. Yeah, I know I sound like a commercial! lol But their actions are sooooooo worth it. I see they have a new action called "Tissue Action" which is a crumpled effect.


OK back to Frangipani...


As you can see the frames are made from the frangipani flowers... one oval and two square.. I provided a background for the oval frame... you can use one of the papers for the square frame.

There are more bows than pictured... 20 bows and 2 knots in all ...
Again... try re-colouring or reducing the opacity to get different effects...
Change the size of them... If any of you have problems with any of the pieces or don't know how to do any of the things I mention, let me know... my email addy is up at top left hand corner... just make the subject "Frangipani". Don't be afraid to ask... 17 months ago I didn't even know how to make a paper & didn't know a plug-in from a gradient!!... so if you are a beginning digital scrapper... just take it slowly and ask, ask, ask!! The gals & guys at Gotta Pixel helped me soooo much.. I still have soooo much to learn.. and I love it!!

Oh that reminds me...
Paula Yagisawa at
Gotta Pixel is having a tutorial.
Gotta Do It! - Folded Corners: 07-21-2007 12:00 PM - 01:00 PM (EST USA)

I'm not going to miss that one!! Paula (dreamerpaula) presents very simple to follow tutorials.. so come on over to the chat and learn how to make a folded corner!

And Tenessaa Allen (tenessaa) has another Photoshop tutorial coming up too..
Tut Your Horn Crop @ 1pm EST: 07-29-2007 09:00 AM - 10:00 AM (EST USA)

Tenessaa always has a nifty new something for Photoshop users...

How did you like the alphas yesterday? Tomorrow is the last of the goodies for Frangipani.. which will include the Fringed & Frayed Mattes, the brushes & patterns and the laces.....

Now on to the Bows & Frames for today... HERE they are!!
Enjoy everyone..
Cheers, Barb

Sunday, July 15, 2007

Day 5 - Frangipani

Day 5 - Today are the alphas, flowers & leaves. Four of the alphas were made with the Atomic Cupcake Gel Action...one is clear so that you can use it with any LO... remember.. you can re-colour the alphas.. just open it up, either double left click .... or right click on the highlighted layer..... takes you to the Blending Options. Choose Color Overlay, for the Blend Mode choose either Overlay or Soft Light.... using those directions on all 4 alphas gives you different colors & effects...
Another thing to try is using one of the colored alphas... go to Image ... Mode... Grayscale.. and then Image... Mode... RGB... and then try the Blending Options, Color Overlay or Soft Light... again... more colors.... Is there a quicker & easier way to take the color out of something and still leave it in RGB?

OK.. off to upload the goodies... HERE they are!
Enjoy everyone!
Cheers, Barb

Saturday, July 14, 2007

Frangipani - Day 4


Thanks Vicki (Chickivaney) for letting me know about the .jpg torn papers in the Torn file.. I've re-done them as png's now plus a couple of others... You'll find them in today's goodies as Torn2.

Our water tank is being installed today.. we're having a major drought here in Queensland, Australia and as of July 1st we may NOT top up the pool or do ANY outside watering with city water. So we bought a 6,000 gallon water tank that will collect the rain water off the shed (it's the size of a 4 car garage) and we'll use that to top up the pool and water our fruit trees (6 mango, jaboticaba, chocolate pudding fruit, orange, grapefruit, lime, Thai lime, mandarin, Barbados cherries, Surinam cherries). Now if it'll just rain!

Today's goodies...

You'll find Torn2, Tags, and Ribbons in today's goodies... after today's goodies there are still 7 more parts to come!!! Did someone say Super Mega Kit??????
Enjoy! Barb :)
Day 4 goodies are found HERE

Friday, July 13, 2007

Frangipani - Day 3

Good Morning all!! Another beautiful day here in sunny Queensland.. about 45 min. north of Brisbane.

I decided to upload Day 3 early.. I'll be taking a nap at 3 or 4pm today.. that's what I get for getting up at 3am!! lol

I made a Vegetarian Lasagna for dinner last night... Came out ok..
But I'd like a better recipe... This one had too much feta in it..
Anyone have a spectacular Vegetarian Lasagna recipe?
One that gives everyone a lot of ooooooooOOOoohhh's and
aaaaaaaahhhhHHhhhhh's?

My email addy is:

dundas2002au@yahoo.com


Enjoy the day!! Cheers, Barb

Today is Photo Corners & Pins... and you can get them HERE
Days 1 & 2 are still available HERE

Stripes up!

OK.. the Stripes are now up and working ... they are Paper1 and Paper2 ... Thank you wanie who said "It is because of the title Striped, the word strip is sensitive to them ... " I'm so glad you told me that!!! I woke up at 3am and had decided to use a different uploader for the stripes!! Little did I know, eh!!!?? You're a life-saver, wanie!!

The same url below works for the stripes..

Today's goodies will be put up in about 10 to 11 hours.
Cheers, Barb

Thursday, July 12, 2007

PapersStriped

Well I'm having one heck of a time trying to get the 2 PapersStriped files to work... I upload them without any problem... but then try to download them and I get an error message.. or one that they're suspected of being illegal.... how can they be illegal when I made them!!!!!!!!!??????
Arrrrrrrrrrrrrugh!!!!!!! pulling my hair out here!!

It's 8:15pm so I guess I'll work on those 2 files tomorrow morning... I'll get them uploaded somehow even if I have to upload them one at a time!!!

Until tomorrow morning....
Barb

Frangipani-Day 2

OK... there aren't 18 parts to the Frangipani Kit... there are 20 parts!! I took the Miscellaneous Papers and broke it up into 3 separate files...

Yesterday I added the laces and the lace rings to the brushes (.abr) .... The Laces are so neat... I broke them up into 3 parts... the rings, the bottom lace and the top lace... and I took the color out of them so that you can add your own color to the rings and a different color, if you wish, to the laces thru the Blending Options --- Overlay or Soft Light... I'll tell you exactly how to use the lace brushes when the time comes. Yes... I'm a tease!

Another tease is the Alphas.. I included 6 alphas, 4 of which use Atomic Cupcake's Glass Action... one of which is is a clear glass alpha which you can use with any LO!

Another tease... and this will be my last for the day... are my Bows... 22 in all ... I made 12 bows and 2 knots using Atomic Cupcake's Bow Template & the Knot Template (soooooooo easy) and then I made 8 other bows that I just dearly love!!

Again... use your own creativity with everything and anything I make... just leave the file names intact, please. Get into Photoshop and experiment with your filters, layer styles, patterns, brushes, custom shapes... re-color everything and anything.. the more you play with Photoshop the more you'll learn how to do it yourself!! Try some tutorials.. practice, practice, practice.

Today is Papers Day!!! I've uploaded 5 files of papers..... I think there are about 60 different papers... yeah, I know.. I went WILD!! But I had so much fun playing with the Photoshop Filters! They are such fun to make but then try to delete a paper from the kit... It's like throwing out a good pair of jeans... I just can't do it!!! I've left the name of the filter I used with the papers.

Everything in this kit was made by me using Photoshop CS2. I'll tell you where I got the ideas when I put the files up... There are 12 sets of goodies still to come.... The Alpha, Bows, Flowers & Leaves, Brushes & Pattersn, Frames, Fringed & Frayed Mattes, Laces, Photo Corners, Pins, Ribbons, and Tags.

And as you've guessed by now... I'm saving the best for the last few days!!!

Enjoy the papers!!! Cheers!!
Barb


Yesterdays goodies and todays papers can be found HERE

Wednesday, July 11, 2007

Frangipani is here!


Finally.... FINALLY... the Frangipani kit is ready!! I've added and added and added, then deleted some, edited some, added some more... I'd keep adding if it weren't for "canay" leaving a comment.. it was the final "come on Barb... move it!!" only canay said it oh so much more nicely as in " Looking forward to seeing your new kit!" So...... over the next few days I'll be uploading pieces to the kit.... Thank you canay for that little nudge. :)

There are 18 parts to Frangipani ... Alphas, Bows, Brads, Buttons, Eyelets, Flowers & Leaves, Brushes & Patterns, Frames, Fringed & Frayed, Laces, Papers-Misc, Papers-Plain, Papers-Stripes, Photo Corners, Pins, Ribbons, Tags & Torn Journal Cards..... The idea for the kit came from our Frangipani next to our pool.. I love the pretty little flowers. All the colors are from the Frangipani... pretty mauves, reds, greens, yellows, lavenders....

I really like this kit and think it's my best so far... you can see the growth taking place over the time I've been blogging... hopefully I can start assembling kits on a faster scale than previously! I have really enjoyed working on this kit... working?? ok.. more like playing!!

Oh... a couple of plugs first.... I subscribed to the Atomic Club Actions on Atomic Cupcake.
I love their actions!! It's $16.95 for a 30 days access. You get all 83 of their actions for that price!! Yes, 83!!! That comes out to a little more than 20 cents an action!!! And you've seen the price of actions... $5.00, $10.00, even $20.00 for ONE action!!!! And these are first rate actions... gorgeous results!!

I used some of the actions in the Frangipani Bows, Frayed Mattes, Alphas. That's another reason I'm late with this kit... I was having wayyyyyy to much fun playing with all the Atomic Cupcake actions!!!!

2nd plug.... ActionFx Photoshop Resources
This is a Photoshop digital scrapbookers dream for brushes, actions, layer styles, pattern sets and custom shapes. They have different things available for Photostop CS3, CS2, 7, 6, 5.5, & 5. I use Photoshop CS2 & Photoshop 7 so I'm downloading tons of goodies in the CS2 and 7 sections. And I mean TONS!!! The membership is $49.95 for a year and it will literally take me a year to download everything. Well worth the $49.95 fee. And this is another reason why I was late with this kit... It is just too tempting downloading all the brushes, actions, styles, shapes, & patterns, and not play with them!!!! I'll be using a lot of their goodies in kits to come!! I've had so many ideas for future kits looking thru the brushes, actions, styles, patterns, & shapes... And Al (Al Ward) is adding new goodies frequently.

OK... the goodies for today are... trumpets please.... Brads, Buttons, Eyelets & Torn... Enjoy everyone...

Please leave some comments... we love to hear your comments, thoughts, requests, etc

See July 19th for link.